Saturday, December 1, 2007

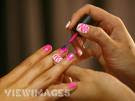
APPLYING NAIL POLISH


Nail polish remover not only wipes off the old color but also the grease from the nails and makes the new color coat stay put for longer period of time. Apply thing coat of nail polish, let it dry and then apply another coat. Even if you want a glossier effect, go for more than two thin coats rather than a thick coat of polish as it dries sooner and lasts longer and do not chip off easily. It is advisable to use the remover and applying nail polish only once or twice a week to prevent your nails from drying. Even if you do this, be sure to use removers with built-in moisturizers to keep your nails healthy. There are some tricks to keep in mind while painting your nails or give them the perfect look:
For the flawless French Manicure, use a white nail pencil to line the nail tip from beneath for that pure white clean look instead of white nail polish.
Do not forget to a weekly hand massage to pamper yourself, increase your circulation and enhance nail growth.
To make the chip-resistant nail enamels last longer, submerge your freshly painted nails in a bowl of ice-cold water for 30 seconds.
While running for the car, you will just need five seconds to put a wide stripe of a quick-drying nail varnish down the center and you are ready to go!
If your nail polish has chipped to an extent that touchups are of no use, better use the remover rather than trying to hide it under a coat of nail paint that makes the texture of your nails took uneven.
You may sometimes even get away with cleaning the nails underneath, rubbing on the buffing cream and use chamois buffer for the healthy shine.
Remember never to file the corner of your nails as it weakens them amd make them brittle.
Get fashionable and funky by doing your nails in a solid color and allowing them to dry. Then use a toothpick to make a diagonal line across your nails in a different color. More skilled artists can go for more complicated patterns of their own.
For club night outs or hot dates, try metallic glints; nail piercing, nail tattoos and embellishments. If your nails are not as long as you desire, you can opt for fake nails too.
A hasty French manicure look can be achieved by using a neutral shade as the base paint and the white shade on the tips of your nails. For shimmer and glitter, use a coat of clear gloss or sparkle on your dried nail polish. Silver glitter looks best on dark blue and black shades while gold glitter goes well with red shade. They are the best choices for bridal look or on weddings of near and dear ones and formal wear.

APPLYING MASCARA


Mascara gives a finishing touch to your eye makeup and must cover the lashes from roots to the tips. Deposit the color on the mascara wand by twirling it in the pack and then cover the upper lashes from their base to the tips in full strokes to make the lashes look thicker, longer, well defined and separated. Mascara is applied from the underside by holding the wand horizontally parallel to the eyelid and the brush is rolled slowly in the upward stroke. For lower lashes, one has to be more careful so as not to smudge the under eye area and the wand is to be held vertically and mascara is applied from side to side. Less mascara is used on the lower lashes and extra color should be blotted off using the tissue paper. Usually women opt for more than one coat of the mascara, which combs the lashes too so that they do not look stuck together.If mascara is deposited on the wand more than needed, tissue the extra color off before applying it. Different colors of mascara such as brown, navy and green can make you look funky instantly. It is important that mascara is used on an individual only to avoid transferring eye infections and if it causes even the slightest irritation in the eye, it must be immediately discarded. Wiggle the brush a little at the roots of the lashes as it allows the bristles to move between the eyelashes, combing them and separating them. Let mascara dry between any of the two coats and comb the eyelashes to separate the wet lashes. Do not rub eyes to remove the mascara but use the eye makeup solvent instead. Before applying mascara, use an eyelash comb or damp toothbrush to comb your lashes. Always use a clean and fresh mascara wand on damp lashes.Black mascara can be used by anybody at anytime though blondes should only use it for bright night makeup. Thin and short brush is best as it is easier to control and gets to the corner of the eye easily. It is also advisable to powder the under-eye area before applying mascara to avoid smudging. Curl the lashes before applying mascara by moving the wand in a zigzag fashion to make the lashes look wider and brighter. Applying mascara only on the upper lashes lend them a dramatic touch, while applying it lightly on the upper and lower lashes, make the eyes seem wider. A gel-based mascara enhances the lashes while thickening mascara looks more dramatic and adds volume to your lashes. Brown, navy and aubergine shades add subtle and sophisticated touch to your eyes while redheads can use burgundy shades. Women with strawberry-blonde hair may try different shades of brown. Be sure not to match your mascara color with your eye color.

APPLYING EYE SHADOW


Eye shadow is perhaps the most beloved cosmetic of creative makeup artists. Since eyes is the most important focal point of the face, the eye makeup techniques and choice of colors for eyeshadow should suit the shape and color of your eyes. The most important trick to keep in mind is that the light colors highlight the spots while dark colors tame them down. The first step in applying the eyeshadow is to apply a neutral concealer that matches your skin tone on the eyelid and then sweep the lightest shade over the entire area from the lash line to the brow line to create the smudge resistant base. Apply the medium shade on the lower lid and blend it into your base shade. A third color can also be added along the lash line and outer corner of the eyes as an accent to create the depth in eyes. The other tips that you can use are:
Blondes with blue eyes should opt for browns and taupes while those with green eyes can go for soft mauves and lilacs.
Blue eyeshadow should only be worn only if you either have fair skin, black or platinum hair and brown or gray eyes or very dark skin.
Don't match your shadow with your eyes or your clothes so that attention remains with your eyes and not your makeup!
Emphasizing the inner corner of the eyes to make them look closer to each other. This can be done by applying a neutral base color over the whole eye and then dust a medium color on the inner half of the eyelid and blend it outward. You can then use eyeliner to line the lid from the inner corner of the eye to the middle and blend it outward.
For day makeup, base color and mascara are the only things you need to wear for eyes.
High quality powder eyeshadows can be used wet for heavier application by dampening your applicator a little.
Lighter shadows help the bigger while darker shades make them look smaller. For bigger eyes, sweep a light shade over lid and darker shade on the outer corner of the lid and the crease. Outline the eyes using the eyeliner on the outer side of upper and lower lids while tapering a bit on the outside the eye to elongate it. Dab a white or cream shadow in the middle of the brow bone as a last step.
Neutral shades like browns and beiges look natural while brighter shades like blue and green look dramatic and artificial.
On mature skin and puffy eyelids, avoid using iridescent, frosted, light colors and white eyeshadows and opt for soft matte colors instead.
Only use cream eyeshadows that do not cause creasing upon application and should be coordinated with powder shadows that are to be used on top of them. They should be applied using fingertips.
Sweep a light or medium-tone shade on the lid and slightly darker shade above the eye crease to downplay the brow bone. Eyeliner should be thick in the middle of the eye and tapering at both ends. Add light highlighter to brow bone.
To add definition to your eyelids, apply a medium-toned shade across the lid and brow bone and dust the under brow area with a light highlighter shade. Use a very fine pencil liner of natural color to line the upper and lower lash lines.
To glamorize eyes for night outs, add shimmer to highlight your eyes.
To lift up tired eyes extend the color from the outer corner of the lid upwards to give them a feline shape. A light highlighter on the brow bone without the eyeliner brightens up the eyes. Concentrate mascara on the inner corner of the eye. To make them look wider apart, keep the inside corners of the eyes lighter than the outer edges. Apply concealer one shade lighter than your skin at the inner corner of the lids and the sides of your nose and blend it well. Use a matte medium to dark eyeshadow and stroke it outward and slightly upward from middle of the lid to its outer half. Use the eyeliner a bit in from the inner corner of the eye and make the line tapering up and out a bit past the outer corner of the eyes.

APPLYING LIP GLOSS


A creamy and shimmery lip pencil smoothens lip tone and thus lends a better look to the lip gloss effect. Ladies with light and medium skin color should use pale natural shades of pencil for defining the lips and give them a better shape along with clear lip gloss with a sheer silver shimmer for a natural look. To make your lips appear soft and light pink, you can line them with pink lip pencil and use the pink-toned lip-gloss. The other shades that will suit them are light mauve, plum with a bit of sheer shimmer gold, pinkish red that may have the touch of sheer shimmer gold, red and red brown. Dark-skinned ladies can try soft pink, reddish brown and deep brown shades of lip pencils with a lighter or similar shade of lip gloss for their lips to look fuller and fresh.For some extra gloss, roll the wand applicator on the back of your hand until it collects in a tiny mound. Then scoop it up using the lip brush and spread it evenly on your lips. For feathering lips or lips having fine lines, gloss should only be used on the center of the lips. Too soft and creamy lip pencils get even more softened by the application of the lip gloss and may cause feathering. Targeting the application of lip gloss on the middle of the bottom lip makes thin lips appear bigger and fuller while to make too full tips look thinner, use deep matter lip colors only and avoid glossy finishes. For a daytime look that lasts all the day long, use a soft lip pencil to define the lips, use natural color lipstick, blot it with the tissue and avoid the gloss but in night, blend the pencil line with the lipstick using sponge applicator, to make lips appear fuller and get that spouty look and gloss them over.

APPLYING LIP COLOUR


Lip liner is not essential but if used, it should be applied first. It should either be neutral in color or match the shade of your lipstick and not darker than your lipstick, so that if the lipstick fades, you don't walk around with only the outline showing. Lip liner is used to define the look of your lips and normally, you start lining them on your natural lip line starting from the center of your upper lip to the outer edge. For sharpening the lip pencil, chill it in the refrigerator for a few minutes first. To make the lipstick stay longer, use foundation on the lips first, then apply lipstick, blot the extra color with a tissue, reapply the lipstick and then dust the lips with powder. Since foundation and powder make lips drier, use lipstick with a creamy formula to counter the effect.For applying the color, stretch the lips and starting at the center of the lip and glide the color to the corners. Lip brushes help you to give better finish to coloring your lips and avoid the application of excess color. A quick way of applying lip color is to use the lipstick to stain the bottom lip, press them together to transfer some of the color to the upper lip and then use the angle tip of the sponge applicator to refine lip edges. For more natural looks, you can try tips given below:
The beautiful raspberry stain can be obtained by applying the berry color on the lips, blotting it with the tissue and then use brush to apply a second coat of the lipstick.
The nude bare lip looks can be obtained by using neutral pink lip color that matches your skin tone. Pale colored women can go for light orange color with a pinkish tint while olive skin can use brownish bronze shade. Avoid lip liners as you don't need the harsh lines. Add clear gloss to the center of your lip and you are ready.
There are lipsticks that add warmth and volume to your lips and are also have a flavor and perfume of their own. So buy the favorite fruity, candy or other flavors of your spouse for your honeymoon!
Older women should use creamier lipsticks.
Orange and brown shades make your teeth appear yellow so until you have that picture-perfect smile, keep them off your lips.
In summers, you may have those dreaded dry cracked lips. Simply use your toothbrush to get rid of the dead skin gently and apply lip balm generously on them to heal them soon.
Brown toned lips take on brown shades such as apricots, beiges, peaches and cappuccinos better than pink or blue toned lipsticks.

APPLYING FOUNDATION


Choosing the right foundation is the first step to a successful makeup result. Perfect matching foundation can only be assessed by correct estimation of skin type, natural color and skin tone. Since most Caucasian, Latin, African and Asian women have yellow-based skin, they must buy foundation with a yellow base too so that it doesn't look like a mask. However, Asian women from the south-Asian region have skin with a yellow-greenish undertone and thus, need a foundation that has same color of pigment as the base. Experts often use two or more shades of foundation to highlight the best features of the face and underplay the low points. To master those skills, need a lot of practice and study. Yet, there are a few points that we can keep in mind while using the foundation at home to give the best possible results, for daily purposes:
Blend the cream foundation smoothly using a cosmetic sponge in long sweeping motions.
Cosmetic sponge helps you to manage and apply foundation more easily and gives a better and smoother result.
For perfect matching, foundations should not be tested on hands or insides of your wrist as the color of your face definitely differs from the color of these areas of your body. The best way is to test the foundation on your jaw line and see whether it matches the natural color of your neck or not. Matching under different light settings gives you a better idea about the correct foundation for your skin.
Foundation needs to be blended, properly, especially under the jaw line, into the hairline, on the ear lobes, corners of the nose and mouth and over and under the eyes, so that they don't let on the difference that the foundation makes to your skin to the viewer.
To retouch a particular spot, reapply the foundation there lightly and blend it with the rest of the face. Then powder it lightly with the translucent powder to let it set properly.
Touchup with dual active powder foundations can easily help you to change your look from day makeup to night makeup as it works as foundation as well as powder. For sheer finish using this foundation, you just have to dampen your cosmetic sponge a little.
While applying liquid foundation, it is better to put small points of foundation at different parts of your face such as forehead, nose tip, chin and cheek bones and then blend a little at a time on the face to give a more finished look. You can use powder foundation just like the normal compact powder

APPLYING EYELINER


Eyeliner is used to give shape to the eyes and define them as desired. An important part of eye makeup, it is often used after eyeshadow and before mascara. Eyeliner can be used to add the dramatic touch to your face or soften the look of your eyes and must be used, keeping the color of eyes and the eyeshadow that you use in mind. Brown, navy and charcoal liners look gorgeous on light colored eyes while brown and plum shades are often used to enhance the beauty of dark brown and black eyes. Precise and dramatic strokes can be achieved by using liquid eyeliner while pencil eyeliner is the best to give soft touch to the eyes. To experiment with colors, you can moisten a small flat brush to use dark eyeshadow as eyeliner or a cake liner and the brush must be held as a pen. Pencil eyeliners need to be sharpened before using them. While applying the eyeliner, tilt your head back slightly and keep your eyes half-open to let you see yourself in the mirror as you are applying the liner. The line must be drawn on the upper lid from the inner side of the eye to the outer side. Let the liner dry before opening your eyes fully. To soften the look of harsh eyeliner, smudge it a little using the brush. Lower lid is lined from outer edge tapering to the inner side of the eye. Liquid liner has to be applied in one smooth stroke while pencil is applied by stroking the area lightly. Too thick eyeliner does not look good so go for thinner lines. Liquid liners need practice and brushed must always be washed with a makeup remover after using them. If your hand is shaky, stand close to the mirror to provide it support from the mirror.While using a powder shadow as a liner, it is wise to hold a tissue directly beneath your eye to avoid it from getting all over the dace. The best tool to apply eyeliner is the sponge applicator. Liner applied as a series of dashes or dots or short feather-like strokes on the lash line are much easier to control than a solid line. If your lids are oily, you need to prepare it first just like you did for eyeshadow to avoid eyeliner from moving up to the crease area. Kohl pencils are ideally suited for the inner rims of the upper and lower lids and not the eyeliner as it soon smears easily and is also not good for eyes.Classic traditional eyeliner look can be achieved by determining the thickness and intensity of the eyeliner according to the eyelid area. Larger eyelid area can use thicker and softer eyeliner while smaller eyelid area needs thinner and more intense liner. Since eyeliner is meant to create depth to the eyes and give thickness to the lashes, traditionally you can stick with dark brown, gray or black eyeshadow for the upper lid and softer tan, taupe, chestnut, brown, gray or black shades for the lower lid