Saturday, December 1, 2007

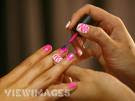
APPLYING NAIL POLISH


Nail polish remover not only wipes off the old color but also the grease from the nails and makes the new color coat stay put for longer period of time. Apply thing coat of nail polish, let it dry and then apply another coat. Even if you want a glossier effect, go for more than two thin coats rather than a thick coat of polish as it dries sooner and lasts longer and do not chip off easily. It is advisable to use the remover and applying nail polish only once or twice a week to prevent your nails from drying. Even if you do this, be sure to use removers with built-in moisturizers to keep your nails healthy. There are some tricks to keep in mind while painting your nails or give them the perfect look:
For the flawless French Manicure, use a white nail pencil to line the nail tip from beneath for that pure white clean look instead of white nail polish.
Do not forget to a weekly hand massage to pamper yourself, increase your circulation and enhance nail growth.
To make the chip-resistant nail enamels last longer, submerge your freshly painted nails in a bowl of ice-cold water for 30 seconds.
While running for the car, you will just need five seconds to put a wide stripe of a quick-drying nail varnish down the center and you are ready to go!
If your nail polish has chipped to an extent that touchups are of no use, better use the remover rather than trying to hide it under a coat of nail paint that makes the texture of your nails took uneven.
You may sometimes even get away with cleaning the nails underneath, rubbing on the buffing cream and use chamois buffer for the healthy shine.
Remember never to file the corner of your nails as it weakens them amd make them brittle.
Get fashionable and funky by doing your nails in a solid color and allowing them to dry. Then use a toothpick to make a diagonal line across your nails in a different color. More skilled artists can go for more complicated patterns of their own.
For club night outs or hot dates, try metallic glints; nail piercing, nail tattoos and embellishments. If your nails are not as long as you desire, you can opt for fake nails too.
A hasty French manicure look can be achieved by using a neutral shade as the base paint and the white shade on the tips of your nails. For shimmer and glitter, use a coat of clear gloss or sparkle on your dried nail polish. Silver glitter looks best on dark blue and black shades while gold glitter goes well with red shade. They are the best choices for bridal look or on weddings of near and dear ones and formal wear.

APPLYING MASCARA


Mascara gives a finishing touch to your eye makeup and must cover the lashes from roots to the tips. Deposit the color on the mascara wand by twirling it in the pack and then cover the upper lashes from their base to the tips in full strokes to make the lashes look thicker, longer, well defined and separated. Mascara is applied from the underside by holding the wand horizontally parallel to the eyelid and the brush is rolled slowly in the upward stroke. For lower lashes, one has to be more careful so as not to smudge the under eye area and the wand is to be held vertically and mascara is applied from side to side. Less mascara is used on the lower lashes and extra color should be blotted off using the tissue paper. Usually women opt for more than one coat of the mascara, which combs the lashes too so that they do not look stuck together.If mascara is deposited on the wand more than needed, tissue the extra color off before applying it. Different colors of mascara such as brown, navy and green can make you look funky instantly. It is important that mascara is used on an individual only to avoid transferring eye infections and if it causes even the slightest irritation in the eye, it must be immediately discarded. Wiggle the brush a little at the roots of the lashes as it allows the bristles to move between the eyelashes, combing them and separating them. Let mascara dry between any of the two coats and comb the eyelashes to separate the wet lashes. Do not rub eyes to remove the mascara but use the eye makeup solvent instead. Before applying mascara, use an eyelash comb or damp toothbrush to comb your lashes. Always use a clean and fresh mascara wand on damp lashes.Black mascara can be used by anybody at anytime though blondes should only use it for bright night makeup. Thin and short brush is best as it is easier to control and gets to the corner of the eye easily. It is also advisable to powder the under-eye area before applying mascara to avoid smudging. Curl the lashes before applying mascara by moving the wand in a zigzag fashion to make the lashes look wider and brighter. Applying mascara only on the upper lashes lend them a dramatic touch, while applying it lightly on the upper and lower lashes, make the eyes seem wider. A gel-based mascara enhances the lashes while thickening mascara looks more dramatic and adds volume to your lashes. Brown, navy and aubergine shades add subtle and sophisticated touch to your eyes while redheads can use burgundy shades. Women with strawberry-blonde hair may try different shades of brown. Be sure not to match your mascara color with your eye color.

APPLYING EYE SHADOW


Eye shadow is perhaps the most beloved cosmetic of creative makeup artists. Since eyes is the most important focal point of the face, the eye makeup techniques and choice of colors for eyeshadow should suit the shape and color of your eyes. The most important trick to keep in mind is that the light colors highlight the spots while dark colors tame them down. The first step in applying the eyeshadow is to apply a neutral concealer that matches your skin tone on the eyelid and then sweep the lightest shade over the entire area from the lash line to the brow line to create the smudge resistant base. Apply the medium shade on the lower lid and blend it into your base shade. A third color can also be added along the lash line and outer corner of the eyes as an accent to create the depth in eyes. The other tips that you can use are:
Blondes with blue eyes should opt for browns and taupes while those with green eyes can go for soft mauves and lilacs.
Blue eyeshadow should only be worn only if you either have fair skin, black or platinum hair and brown or gray eyes or very dark skin.
Don't match your shadow with your eyes or your clothes so that attention remains with your eyes and not your makeup!
Emphasizing the inner corner of the eyes to make them look closer to each other. This can be done by applying a neutral base color over the whole eye and then dust a medium color on the inner half of the eyelid and blend it outward. You can then use eyeliner to line the lid from the inner corner of the eye to the middle and blend it outward.
For day makeup, base color and mascara are the only things you need to wear for eyes.
High quality powder eyeshadows can be used wet for heavier application by dampening your applicator a little.
Lighter shadows help the bigger while darker shades make them look smaller. For bigger eyes, sweep a light shade over lid and darker shade on the outer corner of the lid and the crease. Outline the eyes using the eyeliner on the outer side of upper and lower lids while tapering a bit on the outside the eye to elongate it. Dab a white or cream shadow in the middle of the brow bone as a last step.
Neutral shades like browns and beiges look natural while brighter shades like blue and green look dramatic and artificial.
On mature skin and puffy eyelids, avoid using iridescent, frosted, light colors and white eyeshadows and opt for soft matte colors instead.
Only use cream eyeshadows that do not cause creasing upon application and should be coordinated with powder shadows that are to be used on top of them. They should be applied using fingertips.
Sweep a light or medium-tone shade on the lid and slightly darker shade above the eye crease to downplay the brow bone. Eyeliner should be thick in the middle of the eye and tapering at both ends. Add light highlighter to brow bone.
To add definition to your eyelids, apply a medium-toned shade across the lid and brow bone and dust the under brow area with a light highlighter shade. Use a very fine pencil liner of natural color to line the upper and lower lash lines.
To glamorize eyes for night outs, add shimmer to highlight your eyes.
To lift up tired eyes extend the color from the outer corner of the lid upwards to give them a feline shape. A light highlighter on the brow bone without the eyeliner brightens up the eyes. Concentrate mascara on the inner corner of the eye. To make them look wider apart, keep the inside corners of the eyes lighter than the outer edges. Apply concealer one shade lighter than your skin at the inner corner of the lids and the sides of your nose and blend it well. Use a matte medium to dark eyeshadow and stroke it outward and slightly upward from middle of the lid to its outer half. Use the eyeliner a bit in from the inner corner of the eye and make the line tapering up and out a bit past the outer corner of the eyes.

APPLYING LIP GLOSS


A creamy and shimmery lip pencil smoothens lip tone and thus lends a better look to the lip gloss effect. Ladies with light and medium skin color should use pale natural shades of pencil for defining the lips and give them a better shape along with clear lip gloss with a sheer silver shimmer for a natural look. To make your lips appear soft and light pink, you can line them with pink lip pencil and use the pink-toned lip-gloss. The other shades that will suit them are light mauve, plum with a bit of sheer shimmer gold, pinkish red that may have the touch of sheer shimmer gold, red and red brown. Dark-skinned ladies can try soft pink, reddish brown and deep brown shades of lip pencils with a lighter or similar shade of lip gloss for their lips to look fuller and fresh.For some extra gloss, roll the wand applicator on the back of your hand until it collects in a tiny mound. Then scoop it up using the lip brush and spread it evenly on your lips. For feathering lips or lips having fine lines, gloss should only be used on the center of the lips. Too soft and creamy lip pencils get even more softened by the application of the lip gloss and may cause feathering. Targeting the application of lip gloss on the middle of the bottom lip makes thin lips appear bigger and fuller while to make too full tips look thinner, use deep matter lip colors only and avoid glossy finishes. For a daytime look that lasts all the day long, use a soft lip pencil to define the lips, use natural color lipstick, blot it with the tissue and avoid the gloss but in night, blend the pencil line with the lipstick using sponge applicator, to make lips appear fuller and get that spouty look and gloss them over.

APPLYING LIP COLOUR


Lip liner is not essential but if used, it should be applied first. It should either be neutral in color or match the shade of your lipstick and not darker than your lipstick, so that if the lipstick fades, you don't walk around with only the outline showing. Lip liner is used to define the look of your lips and normally, you start lining them on your natural lip line starting from the center of your upper lip to the outer edge. For sharpening the lip pencil, chill it in the refrigerator for a few minutes first. To make the lipstick stay longer, use foundation on the lips first, then apply lipstick, blot the extra color with a tissue, reapply the lipstick and then dust the lips with powder. Since foundation and powder make lips drier, use lipstick with a creamy formula to counter the effect.For applying the color, stretch the lips and starting at the center of the lip and glide the color to the corners. Lip brushes help you to give better finish to coloring your lips and avoid the application of excess color. A quick way of applying lip color is to use the lipstick to stain the bottom lip, press them together to transfer some of the color to the upper lip and then use the angle tip of the sponge applicator to refine lip edges. For more natural looks, you can try tips given below:
The beautiful raspberry stain can be obtained by applying the berry color on the lips, blotting it with the tissue and then use brush to apply a second coat of the lipstick.
The nude bare lip looks can be obtained by using neutral pink lip color that matches your skin tone. Pale colored women can go for light orange color with a pinkish tint while olive skin can use brownish bronze shade. Avoid lip liners as you don't need the harsh lines. Add clear gloss to the center of your lip and you are ready.
There are lipsticks that add warmth and volume to your lips and are also have a flavor and perfume of their own. So buy the favorite fruity, candy or other flavors of your spouse for your honeymoon!
Older women should use creamier lipsticks.
Orange and brown shades make your teeth appear yellow so until you have that picture-perfect smile, keep them off your lips.
In summers, you may have those dreaded dry cracked lips. Simply use your toothbrush to get rid of the dead skin gently and apply lip balm generously on them to heal them soon.
Brown toned lips take on brown shades such as apricots, beiges, peaches and cappuccinos better than pink or blue toned lipsticks.

APPLYING FOUNDATION


Choosing the right foundation is the first step to a successful makeup result. Perfect matching foundation can only be assessed by correct estimation of skin type, natural color and skin tone. Since most Caucasian, Latin, African and Asian women have yellow-based skin, they must buy foundation with a yellow base too so that it doesn't look like a mask. However, Asian women from the south-Asian region have skin with a yellow-greenish undertone and thus, need a foundation that has same color of pigment as the base. Experts often use two or more shades of foundation to highlight the best features of the face and underplay the low points. To master those skills, need a lot of practice and study. Yet, there are a few points that we can keep in mind while using the foundation at home to give the best possible results, for daily purposes:
Blend the cream foundation smoothly using a cosmetic sponge in long sweeping motions.
Cosmetic sponge helps you to manage and apply foundation more easily and gives a better and smoother result.
For perfect matching, foundations should not be tested on hands or insides of your wrist as the color of your face definitely differs from the color of these areas of your body. The best way is to test the foundation on your jaw line and see whether it matches the natural color of your neck or not. Matching under different light settings gives you a better idea about the correct foundation for your skin.
Foundation needs to be blended, properly, especially under the jaw line, into the hairline, on the ear lobes, corners of the nose and mouth and over and under the eyes, so that they don't let on the difference that the foundation makes to your skin to the viewer.
To retouch a particular spot, reapply the foundation there lightly and blend it with the rest of the face. Then powder it lightly with the translucent powder to let it set properly.
Touchup with dual active powder foundations can easily help you to change your look from day makeup to night makeup as it works as foundation as well as powder. For sheer finish using this foundation, you just have to dampen your cosmetic sponge a little.
While applying liquid foundation, it is better to put small points of foundation at different parts of your face such as forehead, nose tip, chin and cheek bones and then blend a little at a time on the face to give a more finished look. You can use powder foundation just like the normal compact powder

APPLYING EYELINER


Eyeliner is used to give shape to the eyes and define them as desired. An important part of eye makeup, it is often used after eyeshadow and before mascara. Eyeliner can be used to add the dramatic touch to your face or soften the look of your eyes and must be used, keeping the color of eyes and the eyeshadow that you use in mind. Brown, navy and charcoal liners look gorgeous on light colored eyes while brown and plum shades are often used to enhance the beauty of dark brown and black eyes. Precise and dramatic strokes can be achieved by using liquid eyeliner while pencil eyeliner is the best to give soft touch to the eyes. To experiment with colors, you can moisten a small flat brush to use dark eyeshadow as eyeliner or a cake liner and the brush must be held as a pen. Pencil eyeliners need to be sharpened before using them. While applying the eyeliner, tilt your head back slightly and keep your eyes half-open to let you see yourself in the mirror as you are applying the liner. The line must be drawn on the upper lid from the inner side of the eye to the outer side. Let the liner dry before opening your eyes fully. To soften the look of harsh eyeliner, smudge it a little using the brush. Lower lid is lined from outer edge tapering to the inner side of the eye. Liquid liner has to be applied in one smooth stroke while pencil is applied by stroking the area lightly. Too thick eyeliner does not look good so go for thinner lines. Liquid liners need practice and brushed must always be washed with a makeup remover after using them. If your hand is shaky, stand close to the mirror to provide it support from the mirror.While using a powder shadow as a liner, it is wise to hold a tissue directly beneath your eye to avoid it from getting all over the dace. The best tool to apply eyeliner is the sponge applicator. Liner applied as a series of dashes or dots or short feather-like strokes on the lash line are much easier to control than a solid line. If your lids are oily, you need to prepare it first just like you did for eyeshadow to avoid eyeliner from moving up to the crease area. Kohl pencils are ideally suited for the inner rims of the upper and lower lids and not the eyeliner as it soon smears easily and is also not good for eyes.Classic traditional eyeliner look can be achieved by determining the thickness and intensity of the eyeliner according to the eyelid area. Larger eyelid area can use thicker and softer eyeliner while smaller eyelid area needs thinner and more intense liner. Since eyeliner is meant to create depth to the eyes and give thickness to the lashes, traditionally you can stick with dark brown, gray or black eyeshadow for the upper lid and softer tan, taupe, chestnut, brown, gray or black shades for the lower lid

APPLYING CONCEALER


Helping to even out the facial skin, concealers are sometimes the only cosmetic that many women prefer to use along with powder for daily purposes. For summer, you may need a shade darker to match your skin tanned and baked in the sun. It basically camouflages facial imperfections and balances out your complexion by hiding out the skin blemishes and under-eye circles. For accurate results, apply the concealer using a small fine tipped brush and blend it well. A yellow-based concealer is a best match for most of the skin tones while translucent powder helps it to set.A concealer with a high pigment level and having mineral oil as its contents is best for camouflaging purposes as it covers the spot better and stays on the top of the face for more time. It is best to check whether a concealer matches your skin or not in sunlight for correct estimations. Buy the concealer that blends so well that it seems to disappear on the skin and yet hide the targeted spot. Here are some tips to use concealer wisely to get best results:
Adding yellow eye shadow to the concealer can effectively cover dark circles.
Blue or green eye shadow added to concealer is helpful to mask ruddy tones and broken capillaries.
Dry your pimple with the help of a blow dryer on low heat and then use a pointed brush to target the yellow-toned concealer that matches the tone of your foundation, which is dry and has a high pigment level, to the spot. Lightly press around the edges with fingers. Set with loose powder. You can also use concealer pencil for the purpose.
Freckles and pigmentation must only be hidden when it is absolutely necessary as it takes a heavy layer of concealer to cover them up and can look worse. Moisturize the skin well and apply a creamy concealer, which is a shade lighter than your foundation and set it with loose powder. For added glamour, you can also dust it with subtle, skin-toned shimmer powder.
The inside of the nose bridge, corner of moth and outer corner of eyes are the most susceptible areas and need special attention while applying concealer.
The slightly dehydrated residue in the cap of your foundation can be quite an effective concealer that matches your foundation perfectly.
To eliminate under-eye dark circles, choose a creamy concealer with medium pigment level and matt finish. Loose powder may end up accentuating the aging lines in the area. A silky make-up primer with a high level of silicone applied to the area before using the concealer, helps to better mask the area while it also hydrates and smoothen the lines. Apply the concealer by using the synthetic concealer brush and then press into the skin with the fingertips.
To get rid of red scars and birthmarks, use yellow-based concealers. Apply a matt primer to the scars before using drier concealers with high pigment level to cover them up. For raised scars use a slightly darker shade of concealer than your natural skin tone while lighter shade is for indented scars. Set with loose powder. To hide broken capillaries, you need a yellow-based concealer with a high pigment level and pointed fiber brush for precise application. Press the concealer using the fingertips and then dust with loose powder to let it set.

APPLYING BLUSH


Blush is often the last cosmetic to be used on face while doing makeup. The method of applying blush differs with the facial shape and the right application of blusher can make your face look longer or wider, as desired. Here are some tips to use while applying blush:
A little shimmer on the highest point of cheekbone near eyes lends you an instant sexy look.
Accentuate the cheekbones by using a slightly darker shade there while blending it down the cheek for a more natural look.
Clean blush brushes are very important to avoid bacteria transfer in skin and thus, one should clean them with non-soapy cleansers and baby wipes.
Cream blush can be blotted off using a tissue while applying translucent powder can dilute powder blush. However, gel and liquid blush have to be washed from face and the makeup has to be redone.
Cream blush can be used on lips for sheer and soft color and should be applied using the fingertip.
Dusky pink blush warms and freshens up the face, especially on the tendons below the ears, but blush on chin may not look good, if your neck is lighter than your face.
Frosted blush may not be a good idea after all and frost on lips or eyes are more in fashion during night parties. Still, you can get that look by applying a light colored frosted eye shadow or lipstick such as gold, silver, light pink, peach, champagne and beige on the top of the cheekbones. Frosted highlighting powder is also available in the market to be used on any part of your face.
Gels and liquids are best to get rosy cheeks but since they stain the skin be sure to wash your hands after applying them.
Gels are dabbed as dot on apple of the cheek and two smaller dots on cheekbone and rubbed in small circles to blend them well all the way from cheeks to hairline.
Make the face look wider, by looking straight into the mirror and applying blusher on the cheekbone from under the center of the eye to the temple. Suck in cheeks and use the darkest shade in the hollow making a 'C' shape up to the temples but not higher than eyebrows. Use lighter shade on top of cheekbones and stop before the under eye area. You can add a little lush on tip of the nose, forehead and chin.
Never use blush on underside of cheekbones.
Often the small blush brush that comes with the cosmetic is of no use. A full round brush gives a professional look and make the overall look softer and more desirable. It is important to have separate brushes for the blush and the powder.
Powder blush should always be applied in one direction to avoid streaking.
The best method to apply a blush is to take the blush on the brush and tap off any extra color in the box itself. Alternately, if you are using gel or cream blush, put a dab of it on your fingers.
The best shades are warm, golden browns than cool, grayish browns, especially when used as cheek contour.
To find out the actual position of the apple of your cheek, look into the mirror and smile and then sweep the brush upwards in an arc from your cheekbone to your hairline. Color should be light and well blended. To make the face look longer, focus your blush on the outer area of the face and near your hairline. Suck in cheeks and use the darkest color in the hollow making a 'C' shape, no higher than eye on side of face. Use lighter shade on top of the cheekbones and below your darkest blush shade to help slim down the face. Apply lighter shade on apple of the cheeks and chin.

LIP TIP


Lips and eyes are the most important focal points of your face so one must pay special attention to these areas while doing makeup. Here are some additional tips for your lips that you can use:
Lipstick staining your teeth makes you look extremely shabby. To avoid this, pucker your lips in an extreme 'O' and then apply the lipstick.
Even if your lipstick smudges to the insides of your lips, wrap your finger with a tissue and put it into your mouth, and twist it slowly to eliminate any extra color.
You can also highlight your lips by using a light film of eye shadow color coordinated with your lip color in the center of the upper and lower lips.
If one of your lips is larger than the other, balance the look by using the lighter shade of the lipstick on the smaller-sized lip.
Don't let your lipstick pass on to the utensils while dining by using your tongue and lower teeth and avoiding them to come in contact with your lips.
To smoothen the lips a little before applying lip color, rub them a little with washcloth gently.
Apply foundation on and around lips and then define the look of your lips using the lip liner.
If you lips are naturally full and large, don't use the lip liner though you can soften the edge using a Q-tip and avoid glossy and shiny lip color.
If you have thin lips, use light shades to make them appear fuller. Define the lip using the neutral lip pencil from slightly beyond your natural lip line and then apply lipstick covering up lip defining line. Another trick is to apply white shadow on center of both lips over lipstick very lightly and spread it gently.
If your upper lip is too thin or does not have a good shape, outline it with the lip liner similar to your lipstick and in the center portion, draw a second line giving it the precise shape using a brown pencil. Apply color including the brown line. This will make your lips look fuller. To hide lip lines, apply lipstick vertically.

HENNA HAIR COLOURING


Henna Hair Coloring
Traditionally henna has been used for coloring hair for centuries in the Middle East and in India. Using henna for the hair is part of the normal beauty regime in these countries. Henna while coloring the hair conditions it as well. Henna is considered a very good natural conditioner for the hair. Henna strengthens the hair. It has anti fungal properties that help in the reduction of dandruff. Once you use henna on your hair it is easier to detangle and your hair is more manageable. Henna is a natural dye and henna dyes your hair a beautiful and natural red.Henna is natural and therefore does not dye your hair like synthetic dyes. Henna coats the hair with a transparent red coloring. As you repeatedly apply henna on your hair, the color of your hair will get deeper. Henna cannot and does not lighten hair. On dark hair henna provides red and reddish highlights. When henna is applied on black or dark brown hair, the hair will be dyed auburn to burgundy with red highlights that will be visible in the sunlight. Henna will dye blond hair a natural red. Henna on red hair will make the hair a deeper red. Henna will dye white hair a natural red or a deep red. An advantage of using henna is that it is natural and therefore conditions and colors your hair in a natural and safe manner. Another great thing about using henna is that you can make a paste to suit your hair type. Some people who are concerned about their hair becoming dry add special essential oils to their henna paste. People add floral water, eggs and other natural dyes to their pastes in order to create the perfect paste.
Henna Paste

For henna powder to release the dye you will have to make a paste of the henna powder with water or lemon juice. There are a number of things that can be added to the henna powder to make a paste that will stain your skin or hair the color you desire. Most people follow a trial and error method and finally come up with a recipe that suits their needs. Given below is a basic henna paste recipe, you can try it out and add to it to suit your needs. To make henna paste or mehendi
1 cup boiling water
2 tablespoons black tea or coffee
3 tablespoons of sifted henna powder (make sure you sift the powder before making a paste)
1 teaspoon eucalyptus oil
Lemon-Sugar Glaze
Strained juice of ½ lemon
1 teaspoon sugar
Boil the water and add the tea or coffee powder and make a decoction. Let this decoction soak for a few hours. Strain the decoction to remove any particles of tea or coffee. Place the henna powder into a plastic or glass bowl and add eucalyptus oil. Now slowly add the tea/coffee decoction a little at a time and stir the mixture. Use the spoon to press the powder and water together. Make a smooth paste of the henna powder. Allow the paste to stand for 6 to 12 hours. The longer you allow the paste to stand the smoother the mixture will become. Now apply this paste in any design you want and wait till the mehndi is dry, but not cracking. Take a cotton ball and dab a little lemon-sugar glaze to keep the henna moist. Keep the henna on for as long as you want.After you remove the henna paste design from your skin, try not to wet the area for as long as possible. It is best to leave henna overnight. Using lemon-sugar glaze will ensure that the mehndi stays overnight. The less you wash the colored area of your skin the longer the design will last. If the colored skin is constantly touching water then the color will fade quickly. Applying lotions or creams will cause the design to loose color. A henna tattoo cannot be removed; it will have to fade off on its own. The color may last on your skin for two or three weeks or longer.

NAIL CARE TIPS


Your nails are an important part of your hands and they too need to be taken care of well. Well-kept hands with neat, clean, painted nails are a pleasure to behold. Dirty and unkept nails will make your hands look ugly. Your nails need to be strong and healthy for your hands to look beautiful. Here are a few tips on nail care.
To harden soft nails soak them in warm olive oil for about 20 minutes on alternate days.
For strong nails soak them in a mixture of horsetail.
To remove stains from your nails, mix one tablespoon of lemon juice in a cup of water and soak your nails in this liquid for a few minutes.
It is not a good idea to remove the cuticles from your nail, as it will make the nail susceptible to infection.
If you use nail polish then do not use acetone polish removers.
When you wear nail polish, give your nails a break from time to time. Leave them without polish for a few days.
For natural nail polish rub petroleum jelly on your nails then buff with a soft cloth.
If you have brittle nails or split or dull nails then here are a few vitamins that will help you:
Organic Silica: this will increase the growth of nails and prevent them from becoming brittle.
Essential Fatty Acids: Found in most oils are good for healthy and strong nails.
Vitamin B especially B5: Important for healthy skin and nails.
MSM (Methyl-Sulfonyl-Methane): important for healthy nails. Ensure that you follow a hand care regime, even it means only applying moisturizer on your hands. Even if you do this regularly it will go a long way in making your hands look better.

HAND CARE RECIPIE


Our hands have very few oil glands and therefore we must take special care of our hands. Our hands come in contact with chemicals, detergents, and garden dirt etc. that further damages the skin on the hands. Your hands must be well cared for. You should exfoliate your hands and moisturize them regularly. Given below are a few hand care recipes that you can make at home to take special care of your hands.
Hand Sugar Exfoliant: Mix two tablespoons of oil (vegetable, olive, baby or safflower) with three tablespoons of sugar, it is better if you use the coarse variety. Make a paste and gently rub them on to your hands. Wash off with warm water and dry thoroughly.
To soften coarse and dry hands use this mixture. Mix one tablespoon of lemon juice with a teaspoon of sugar and a little water. Apply this mixture on hand and wash off in about a minute.
Nourishing Hand Cream: Mix 1/3 cup of glycerin and 2/3 cups of rose water. Combine the two by putting them in a bottle and shaking it well. Massage into your hands as often as possible. Store in cool dry place. Glycerin is a humectant that is it attracts moisture to your skin. Therefore it is important to use it to rehydrate your skin.
Recipe Cuticle Softener: Warm a teaspoon of Olive Oil and after your bath push your cuticles back and massage this oil into them. Use the tips of the fingers to massage the oil. Use these simple home recipes for your hand and you will notice the difference in a few weeks. These products do not have preservatives so their shelf life is about a week.

HAND CARE TIPS


Beautiful, well-kept and delicate hands are important. Hands tell you a number of things about yourself. Hands tell you how you lead your life and how you take care of your body and skin. It is said that the hands tell you how old a woman is. No matter how old you are, your hands tell an observer a lot about yourself as a person. Dressing up in fancy clothes is of no use if you do not take care of your hands and feet. While speaking or communicating with others you use your hands to express yourself, emphasize a point etc. Hands play an important role in communication. Imagine what life would be like without your hands. It is a part of the body that you use the most, you cook with them, get dressed with them, write with them, empathize with them and shake others hands when you meet them. Take good care of your hands and treat them well as they are essential for your existence.Here are few hand care tips:
The skin on your hand is thin and delicate; therefore take special care of them.
Moisturize your hands at least four times a day.
Use your face exfoliator on your hands once a week.
Once a week apply your face cream on to your hands before you go to bed.
For dry hands after washing your hands with soap, wet them again. Pour salt on your hands and then scrub them under water. Dry hands and apply moisturizer on them.
For greasy hands, after washing your hands rub cornmeal on them.
Wear rubber gloves while working at home and in the garden.
Protect and prevent your hands from aging and abuse.
Protect your hands from the ravages of changing weather.
Protect your hands while working in the sun. The best way to take care of your hands is to protect them on a daily basis.

RELEIVE TIRED AND SWOLLEN FEET


Your feet are the most used and abused part of your body. You are on your feet all day and you rarely think of consciously resting your feet or relieving your tired feet. Sometimes your feet may even swell because they are very tired. You must take some time out and relax and relieve your tired feet. Here are a few ways in which you can relieve your tired feet.
If your feet are swollen then rest your feet above your head for about 10 minutes. To do this lie at right angles to a wall, or on a bed with your feet on the headboard or on the floor with your feet resting on the edge of a chair. The swelling will subside as trapped fluids travel back from your legs towards to your heart.
Dip your feet into a tub of cold water or sit on the side of the bath with your feet under a cold-water tap. After this put your feet up for a while.
Take cold drink cans from the fridge and roll your feet over them.
Squirt your feet with cooling foot spray. Buy one with mint; they are easily available at the chemists. Refrigerate them when the weather is hot.
You should treat yourself to a foot massage every week. Before you begin the massage, wear loose comfortable clothes and sit in a comfortable chair with your back supported. You can make your own foot massage solution at home. You need:
· 2 teaspoon of castor or jojoba or soybean or extra-virgin olive oil.·3 drops of lavender essential oil.·1 drop German chamomile essential oil.·1 drop geranium essential oil.
Mix all the ingredients in a small bowl and massage gently into your feet. Once you do this put your feet up for sometime. Wash your feet with a mild soap and apply nourishing cream on your feet

HOME MADE FOOT SCRUB


The skin of your feet needs to be exfoliated and renewed like the skin in any other part of your body. There are different types of scrubs that are available in the market today. But you can try this homemade foot scrub and you will realize that is just as good as any of the commercially available foot scrubs. Before scrubbing your feet you can soak it in a homemade foot soak. Given below is the foot soak recipe.Foot Soak Recipe:
½ cup sea salt
3 slices of lime
5 to 10 mint leaves
5 drops of essential lime oil
Combine all these and add to a basin filled with warm water.Scrub Recipe
3 limes
2 tablespoons of white sugar
1 tablespoon of sweet almond oil
15 fresh mint leaves (chopped)
5 drops of lime essential oil Cut the limes into small pieces and pulse these pieces into a thick pulp in a food processor. Mix this lime and the remaining ingredients in a small bowl.Soak your feet in the homemade soak for 5 minutes. Then apply the homemade foot scrub with your hands using circular movements around the foot, ankles and calf. Remove the scrub with a warm, damp towel and then apply a mint moisturizer all over your feet.

FOOT CARE TIPS


It is true that most of us neglect out feet. Taking care of our feet normally takes a back seat when compared to other beauty treatment. But we need to take care of our feet if we want to stay active and comfortable all through out lives. Taking care of our feet is important as if they do get damaged then a simple job like walking can become a painful exercise. Foot care can be simple and easy. Here are a few simple foot care tips that are not only good for the feet but are relaxing as well.
Take care of your feet regularly to keep calluses under control. Use a pumice stone or an abrasive foot scrub to remove the dead and rough skin. If this skin is not removed it will become hard and thick and can become cracked and infected making walking difficult.
Give your feet a foot bath. Put a cup of marbles in the bath water and roll your feet around on top of them to stimulate the nerve endings. Pick up the marbles with your toes, flex and contract your feet and toes and then let go off the marbles. This will allow the arches and muscles of the feet to stretch.
Get a foot massage once in a while. Ask a loved one to take time off to give you a foot massage. At the same time you can have a foot massage, which is extremely relaxing. Add a few drops of peppermint essential oil to your lotion for a sensational treat for your feet.
The skin on the soles of your feet does not have any oil glands to soften them. So use a good moisturizer every day. Every night put a generous amount of cream on your feet before you go to bed and then pull on a pair of cotton socks.
Every time you buy shoes ensure that you get your feet measure. Measure your feet standing and not sitting. The shape of your feet changes with age as a result of the daily pressure and pregnancy. Your feet are likely to expand and lengthen with age. Replace your shoes every 6 months as well-worn shoes lose their ability to support your feet properly. This can lead to feet, leg and back fatigue and problems. If your job requires you to be on your feet all day it is best you change your shoes every 6 months.

PRETTY FEET


Foot Care
The way your feet look gives the observer an idea of the way in which you take care of yourself. Everyone wants to have beautiful and healthy feet. To have beautiful skin you have to take care of the skin on your feet. You have to regularly take care of your feet. You will have to soak your feet to soften the tough dead skin, then you will have to scrub off the dead skin from your feet and them moisturize your feet with a nourishing cream to keep it soft and smooth. You should exercise your feet and use comfortable shoes that allow your feet to relax and breathe easily.
Foot Exercise
Our body needs exercise to stay healthy and function properly. As our feet are part of our body they too need to be exercised. You need to exercise your feet everyday to keep them healthy. The best exercise for your feet is to walk bare feet on the grass in your garden. Here are a few other exercises that you can do to strengthen your feet
Foot Care Information
We all know it is important to take care of our feet like we do any other part of our body. Even while taking care of our feet there are some things that we must remember. In our enthusiasm to take care of our feet we must do damage them. Given below is some information of foot care don'ts and do's.
Foot Care Don'ts
Do not apply lotion between your toes, as it can lead to fungal skin infections.
Do not use a razor on your calluses. Use firm pressure and your nail file instead.
After wearing heels for an entire day, ensure that you give your feet a break and slip them into a pair of comfortable sandals.
Foot Care Dos
Rub your foot with a soda can or tennis ball. This will soothe and relax your feet.
Use petroleum jelly on dry feet before you go to bed and then cover them with socks. They will be softer and sleeker in the morning.
While applying polish starting with the smallest toes and continue across all the toes
.

LOOK YOUNGER


No matter how old you are you would like to look young and smart. There are a number of beauty tricks that can take the years off you. These beauty tips will make you look young and you will start feeling young too. Read the simple tips given below for a younger and smarter look:
Wear your hair below your chin. Side-swept bangs and hair just below the chin will make you look younger.
The shade of lipstick you use can add or take off years. Do not use lipsticks in shades of brown.
After you are thirty do not over pluck your eyebrows, as they may not grow back as quickly as they did earlier.
Get your teeth whitened. Get the stains of coffee, tea or red wine removed and you will look much younger.
Stand straight and erect. Stand straight and erect. This will make you look a lot thinner and look younger too. This will also increase your confidence as well. Get a good night's sleep. If you do not sleep well your eyes will look puffy and your skin will look shallow and dull and your face will sag.

DARK CIRCLES

Our face attracts the most amount of attention. Therefore, we pay most attention to the way our face looks. We take special care of our face, its skin, its appearance and we try to present our face in the most beautiful manner we can. In a person's face, it is the eyes that catch the attention of the observer. If the eyes are beautiful the beauty of the face is enhanced. But a problem that a number of women face is dark circles under the eyes. When a woman has dark circles under her eyes, no matter how beautiful her eyes are their impact is diminished because of these dark circles. If we understand the cause of dark circles then we may be able to deal with them and treat them if possible. There are a number reasons for dark circles under the eyes. Given below are some of the common causes for the unsightly dark circles.
Heredity: Dark circles under the eyes can be an inherited trait. If you have dark circles, then it is likely that other members of your family have dark circles too. The skin under the eye is very thin. When blood flows through veins close to surface of the skin it can produce a bluish tint. If your skin is transparent then the darker the circles will be. Transparent skin is also a inherited trait.
Exposure to Sun: Exposure to sun especially during the summer months can make the skin under the eyes look darker. This is true for dark skinned people as well. Suntans are caused by an increase in the natural pigmentation of the skin, as a result of exposure to the sun. This increase in pigmentation is drawn to the surface. This applies to the skin under the eyes as well.
Allergies and Eczema: Any infection of the eye that leads to itching can contribute to dark circles as rubbing and scratching the eyes darkens the skin. People who suffer from hay fever will notice that dark circles appear when the allergy is at its height. Certain food allergies can cause dark circles too.
Medication: Any medication that dilates your blood vessels can cause dark circles under the eyes. As the skin under the eye is delicate an increase in blood shows through the skin in the form of dark circles.
Nutrition: An improper diet, an unbalanced diet or lack of a nutritious diet can cause dark circles under the eye.
Tiredness and Lack of Sleep: A lack of sleep or excessive tiredness can cause the skin under the eyes to become pale, thus, making the blood flowing under it visible.
Pregnancy and Menstruation: During pregnancy and menstruation the skin becomes pale and the veins under the skin become visible. Age: As you grow older there are greater chances that you will have dark circles and they may become more prominent and permanent. If there are too many folds in the skin under the eyes, it will make the dark circles more prominent.

BEAUTY FOOD


There is no doubt that all of us want to look beautiful, slim and fit. One has to exercise sufficiently to look good. But it is important to eat the right kind of diet to look beautiful. There are a number of beauty foods that are healthy and help in enhancing your looks. Given below some foods that you can add to your diet if you want to look beautiful.
Apple Cider Vinegar: This vinegar has a number of healing properties and it makes the skin soft and supple. Apple cider vinegar is concentrated with enzymes and these help peel off dead skin cells. It breaks down fat and helps food digest properly.
Carrots: Help to maintain the outer layer of the skin to prevent premature aging. It works just like Retin A.
Cheese: Make a slice or two of hard cheese a part of your diet. Cheese helps to prevent bacteria from growing in the mouth and prevents cavities. Choose between Swiss, cheddar or Gouda.
Citrus Fruits: These fruits hold the skin cells together by forming collagen. Collagen cannot be added to the skin topically and hence fruits and juices must be made an integral part of your daily diet.
Cranberries: These berries keep the urinary tract lining healthy.
Garlic: Helps to combat wrinkles and restores tissues.
Nonfat Yogurt: Is high is calcium and helps to keep your smile white and your teeth cavity-free.
Sweet Potatoes: These potatoes are full of vitamin A and vitamin A is known for being an anti-wrinkling agent. The result of eating this vegetable is smoother skin.
Tomatoes: This vegetable does wonders to your skin. Tomatoes are rich in vitamin A, vitamin C and potassium.
Wheat Germ: To get rid of pimples efficiently include two or three tablespoons of wheat germ in your diet. You add this to your cereal, yogurt and cottage cheese.
Here are some general tips about a beauty diet:
Vegetables: you should have three to five servings of vegetables daily. Include one serving of raw, leafy greens.
Do not have more than three-ounce servings a day. Take off all the fat. Try to include two servings of turkey or chicken and a serving of fish a day is ideal.
Fruits: Have two to three servings everyday. ½ cup of chopped or sliced fruit is one serving.
Dairy: Have at least two servings daily. One serving is eight ounces of milk or yogurt.
Fats: Salad dressing, cooking oil, butter and mayonnaise should be limited to two servings a day. Eat these foods for beauty and follow the beauty diet and you will notice that over a short period of time you are looking better than you did before.
Your diet contributes a great deal towards making you beautiful. Therefore eating a proper healthy diet is important to keep looking beautiful. Given below are a number of food items that you should include in your beauty diet.
Almonds: These nuts are known for their anti-aging properties. They contain a lot of vitamin E and have a high amount of fatty acids that help to keep your skin supple. Almonds also contain antioxidant selenium. Do not too many of them as they will add calories. A handful is enough.
Protein: To keep nails strong and moisturized by eating plenty of protein. Protein helps in the build up of keratin. Keratin is the substance that makes up nails. Skinless, boneless chicken breast, lean turkey, tuna and beans are rich in proteins.
Vitamin B: Food that is rich in vitamin B makes your hair shiny. Important sources of this vitamin are eggs, milk, green vegetables and poultry. Silica is important to keep your hair elastic, shiny and healthy. Raw oats, cucumber skin, onions and bean sprouts are rich in this mineral.
Fish: Eating oily fish like salmon that contain omega-3 fatty acids will help hydrating and nourishing skin.
Zinc and Calcium: Both these minerals help in eradicating pimples. Zinc is found in oysters, turkey, seafood, eggs and milk. Calcium is no doubt good for your bones, but helps in clearing your skin too. Calcium rich foods like skim milk, low-fat cheese and yogurt. These foods not only remove pimples but reduce wrinkles as well.
Vitamin C: Vitamin C helps in the build up of collagen, which reduces wrinkles. When your skin has more collagen your skin retains its elasticity and wrinkles take longer to form. Kiwi fruit is the best source of vitamin C. Other good sources are oranges, mango, honeydew and papaya.
Vitamin E: Vitamin E is known to ease the swelling and redness associated with sunburns. Swelling causes the stretching of skin that in turns leads to wrinkle formation. Eat plenty of peaches and blueberries to increase the build up of vitamin E in your body.
Vitamin C and Iron: Vitamin C and iron together help to reduce the dark circles under your eyes. Eat skinless chicken and red, yellow and orange peppers. These are rich in both and will help in reducing dark circles.
Water: Drink as much as water as you can. Water removes the toxins from the body and refreshes your skin and makes in glow. Water hydrates your skin and keeps it supple.
Tomatoes: Tomatoes contains skin-caner-fighting antioxidants: beta-carotene, vitamin C and lycopene. Eat tomatoes in any form and you will ingest these antioxidants. To increase the body's absorption of lycopene cook tomatoes in a little olive oil. Apples and Celery: To remove stain from the enamel of your teeth eat crunchy foods like apples and celery.

TRAVEL BODY CARE


Travelling takes its toll on the body, especially if you are traveling abroad. Jet lag has adverse effects on the body. It is important to take care of your body and health while you are traveling. It is essential to eat healthy food and get sufficient amount of sleep in order to reduce the effects of travel. Here are a few tips on how to take care of your body and health while traveling abroad.
Try and eat as much fresh food as possible on your trip. Eat fresh fruits and vegetables throughout you're the journey. Apples, bananas, unsalted peanuts, dried apricots etc. have the nutrients that are necessary for your body and helps in keeping you alert and active.
Avoid drinking alcohol and aerated drinks, as they will make you feel thirstier. Do not eat food that is high in salt content, as they will result in swollen ankles and feet.
Jet lag can result in dehydration, fatigue and hunger. Try to keep your meal timing constant and eat as little as possible after dark. While traveling, eat small portions and eat slowly.
No matter how you are traveling, ensure that you use a pillow to support your neck. Use a washable pillowcase that is soft so that your skin does not get creased.
You could even wear a sleep mask on the journey. Most of them are made from soothing herbs that will reduce puffiness and some have a cooling effect. Using these will ensure that you look better after a long journey.
If you can sleep during your journey, use a little eye cream under your eyes and a small amount of light night cream. This will ensure that your skin is refreshed and relaxed when you wake up. Follow these simple tips and you will feel and look much better even after a long journey.

SHAVING FOR WOMEN


Shaving among women became the rage during World War II when the supply of nylon stockings plummeted. It was then that the trend of bare legs started and to this day is a fashion statement. Today though many women wax their legs, shaving is still the least expensive way to remove your hair. Shaving has to be done carefully or it will result in nicks and irritation. Here are a few shaving tips for women to ensure that they are doing it right.
Do not shave dry skin. Wet your skin and let the moisture soften your skin. Shaving is a natural exfoliator and if your skin is dry, your razor will get blocked with dead skin and you are likely to nick yourself as well.
Do not waste money by buying creams specially made for women, as they are almost the same as those made for men.
To find the perfect razor you will just have to use all those available and choose the one that you like best. You can ask your friends who shave to recommend razors. Look for a razor with lubricated strips, pivoting heads and spring mounted multiple blades.
Exfoliate before you shave to ensure that the dead skin cells do not clog your razor and prevent a close shave.
For your legs you will have begin shaving from your ankles and then work upwards. For your underarms you will have to shave in every direction as hair grows in every direction under your arm.
After you have finished shaving apply oil or moisturizer. The skin on your leg has few oil glands and hence may become dry.
When hair curls back under the skin it caused ingrown hairs. To avoid ingrown hairs exfoliate everyday and use a glycolic acid body lotions.
If you have a chronic case of ingrown hairs then use a lotion that is specially made for ingrown hairs, that is easily available at the chemists. Apply it in the morning and at night and the bumps will vanish within a few days. If you shave your legs coarse hair will grow back fast. Therefore consider waxing your legs at least.

TANNING


Getting a tan in the sun is not the really safe way of tanning yourself. Using a self-tanning product is a safe way of getting a tan. The tan from a self-tanning product not only removes the white areas caused by winter but they also give you some amount of protection against the sun. The tan that one gets from using these products normally washes off easily. Today there is an increasing demand for semi-permanent tanning lotions. Most of these self-tanning products come with additions like vitamin E and aloe vera that softens and moisturizes the skin. In order to ensure that the tan does not look fake choose a tan color that suits your skin color. Most self-tanning products are available in a range of shades.To ensure that your tan lasts longer, use the following tips to prepare your skin:
Exfoliate your skin with a body scrub to remove loose flakes of skin. This will ensure that the tan does not look patchy and it will last longer.
Moisturize the areas you want to tan. This will allow the self-tanning lotion to spread smoothly and reduce the chances of streaking.
Apply the self-tanning product with long firm strokes on your legs and arms. Rub the lotion using a circular motion into your stomach, buttocks and checks.
Apply self-tanning lotion carefully to the dry areas of your body, as they will absorb more color. Pay special attention to your knees, elbows and heels.
To ensure that you have an even tan around your eyebrows and hairline, use a cotton bud to remove any tanning lotion that gets accumulated. Use this along the side of your nose and along laughter lines, as tanning lotion normally clogs around these areas and tans the areas more.
Do not apply self-tanning product on your nails, as they will turn orange.
Wash your hands well after applying self-tanning lotion, especially wash your cuticles and under your nails. Do not wear clothes or sleep on your bed cover for about half an hour at least. This will stain your clothing and bedcovers.

PERFUMES


Both men and women use perfumes or fragrances. Everybody likes to smell nice and pleasant and nobody wants to stink of body odor. Women have a wide range of perfumes to choose from. There are perfumes specifically meant for the day and those that are specially meant for the night. Many people do not know how to buy perfumes. Here are a few pointers as to how to choose a perfume:

Try the perfume before you buy it.
Try buying new perfumes. While buying new perfumes limit yourself to three perfumes, as your nose will not be able to differentiate between the perfumes if you try too many.
The same perfume will smell different on different people because it will react differently to each person's body.
Wait for 10 minutes after applying the perfume, it will give you the right smell after it reacts with your skin.
After buying the perfume of your choice your would like to get the most out of the perfume. Here are a few tips on how to get the best out of the perfume:
Do not expose your perfume to extreme temperature and sunlight. After the perfume bottle is opened the perfume will change and exposure to sunlight will disturb the delicate smell of the perfume. Store it in a cool dark place to keep the fragrance intact.
Use shower gel, body lotions and body sprays of the same fragrance as your perfume it will last longer if you do this. Use your perfume as a highlight on your pulse points finally.
Perfumes should be used throughout the day. Even concentrated perfumes do not last for the whole day. You will have to re-apply every 3-4 hours.
Use a different perfume for the morning and a different one for the night. Choose a perfume according to your mood.
Here are some interesting facts about perfumes:
Women have a keener sense of smell than men.
The sense of smell is affected by your medication, diet and lifestyle.
Perfumes react differently on blondes, brunettes and redheads.
Our ability to remember smell is greater than the ability to remember things that we have seen.
Our sense of smell is sharper in the latter half of the day.
The older you grow the less sharp your sense of smell is.
Perfumes rise and if worn only on the face or behind the ears, it will rise and vanish quickly.
Oily skin holds perfumes better than dry skin.
Perfume once opened will fade with time.
Increase in altitude reduces the lasting ability of a perfume.

CELLULITE REDUCTION AT HOME


Cellulite arises when the connective tissue puts pressure on the fat making the fat bulge under the skin. The less fat you have the less noticeable the cellulite is. A healthy diet and exercise help in reducing cellulite. To reduce cellulite you will have to detoxify your body, especially the liver and colon. During detoxification cut out nicotine and caffeine, do not eat extra salt or fat and drink a lot of water. Eat things like soya, blueberries and nuts. Ensure that you have sufficient intake of nutrients like glucosamine, B vitamins and essential fatty acids. Onions are good for reducing cellulite. Onions act like a natural diuretic and will release the excess water from the skin cells.Do exercises that will help you loose weight on your legs and buttocks. Do special exercises to improve muscles in your thighs like walking, cycling, climbing stairs, yoga and pilates. Once there is a build up of muscles cellulite will disappear. Muscles will stretch the skin and smoothen the dimples appearance. Massaging the areas that have cellulite will increase circulation and break the fat up. You can use a body brush or use a body wash or exfoliator while bathing. This will also increase circulation. Use aromatherapy oils like sage, cypress and juniper help in cellulite reduction. Wearing pantyhose helps to reduce cellulite. Wear those that are body shaping and contour your thighs. Pantyhose press the fat and help circulation. There are pantyhose specially made to help reduce cellulite. Make a body wrap at home using coffee and seaweed to reduce cellulite. Spread warm ground coffee on the troubled areas, wrap with moist seaweed and then cover with plastic wrap. Keep this on for about half an hour. Unwrap and wash off in the shower, while doing so massage the area. There are a number of commercial products too that you can use to reduce cellulite. It is important to have a healthy diet and exercise regularly to prevent the buildup of cellulite.

HAIR REMOVING TECNIQUE


For decades now, women have been removing unwanted body hair, using different techniques. Not only does it add to the woman's beauty but it is better for her personal hygiene as well. Today getting rid of unwanted hair has become easier than ever. There are a number of easy techniques that you can use at home or you can visit a beauty parlor for professional treatment. Given below in some information about the different techniques that are available today.
Shaving: Shaving is a popular technique as it can be done at short notice and gives you instant results without much effort. Most women still continue to shave inspite of alternate techniques being available. This method is quick and cheap, though the hair grows back rapidly and when the hair grows back it is very coarse. You should soften the hair by washing the area with warm soapy water. Use light gentle strokes in the direction of the hair growth, to remove the hair. After you finish moisturize the skin. There are different kinds of razors, electrical, disposable, with twin blades and moisturizing strips. Choose one that suits you the best.
Hair Removal Creams: These creams are manufactured in such a way that they dissolve the hair. These creams have an ingredient called keratolytic that will damage the skin if it is left on for a long time. Use a patch test the first time you are using a cream. But there is no doubt that they make the skin hair free, smooth and soft.
Waxing: Though this method is a little painful, it is good to remove hair from the arms, legs and bikini line. Hair re-growth after waxing is slow and may take as much as two months. It is best to do a patch test for waxing as well. For best results one should continue waxing on a regular basis. Hair is removed from its root and when it re-grows it is finer. The problem with waxing is that the hair has to grow a little for waxing to be efficient. It helps to dust a little talcum powder on the area before waxing.
Sugaring: This technique is similar to waxing. Here the removal solution is warmed and then applied on the area required with the help of a palette knife. The solution is applied in the direction of the hair growth. Then a cotton strip is used to cover the solution and torn away in the opposite direction and thus the hair is removed. Hair re-growth takes about six to eight weeks and it is fine.
Electrolysis: This is a salon treatment and is expensive, but last longer and could be permanent as well. This requires a series of sittings if the results are to be good. A fine needle passes a very low electrical current into the hair follicle. After a session there will be slight swelling, redness and scarring which will take a few days to disappear. Laser treatment: This is another salon-based treatment that is expensive too. You need a few sessions for good results. Black activating lotion is applied over the area, to enable the hair follicle to absorb the laser energy. In this technique the best results are got from people with thick body hair.

BATHING


One of the most important ways of taking care of your body is to have a good bath. There is no doubt that a good bath cleans and refreshes your body but it can be relaxing for the mind as well. It is important to have a bath everyday in order to maintain good hygiene as well. A bath in the evening or night removes all the dust, grime and sweat that you have gathered throughout day. A bath early in the morning refreshes you and makes you ready for the whole day. Bathing can be made a relaxing and enjoyable experience. Making the right kind of arrangements in the bathroom and adding the right kind accessories in the bathroom can make your bath refreshing and soothing.Here are a few bathroom ideas to create a luxurious bathing experience:
Keep a stock of soft fluffy bath towels. Use a heated towel rail to warm them. This will make you feel nice and pampered after your bath.
Invest in a good bath pillow, as it will help you relax while soaking in the bath.
Create a soothing and relaxing environment in the bathroom by using tea lights and scented candles, as it will create a peaceful environment.
Spoil yourself with luxurious, fragrant soaps and bath oils.
Turn off the phone and switch of the answering machine and your mobile and anything else that can disturb your bath. Play some calming music that will help you relax better.